Principles of Attachment Selection for Implant Supported Overdentures
| Principles of Attachment Selection for Implant Supported Overdentures | Hamid Shafie, DDS* and George Obeid, DDS** |
|
**due to the size of some of the pdf files some might be hard to load, download the pdf instead. |
|
 |
vent hole. Allow the auto-cure resin to fully polymerize before removing the overdenture.
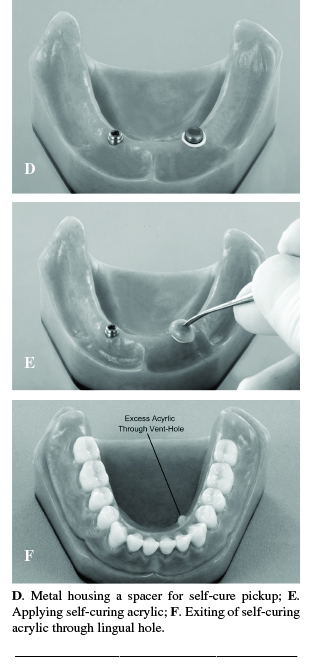
• Add any remaining Locator® housings in a similar manner. • Finish the lingual of the overdenture, and fill in any voids on the intaglio surface with auto-cure resin. (Fig. 8F) Direct Technique for Adding Locator Males Without Processing Spacers Use the following steps to add Locator® males to a finished overdenture that were not processed using processing spacers. • We recommend making holes through the acrylic to visually verify that adequate space exists around the metal housings and white spacers. We recommend air-abrading the metal housings, if possible. Place the white spacers over the Locator® females, and place the metal housings with black processing inserts. (Figs. 9A, 9B, facing page) • Prepare a thin mix of auto-cure resin. (Fig. 9C) • Quickly place the resin over the Locator® metal housings, and ask the patient to close in light centric occlusion until the resin is completely polymerized. (Fig. 9D) • Once the auto-cure resin is set, remove the overdenture. Finish the lingual aspect of the overdenture, and fill |
|||
|
SROMS |
|
14 |
|
Volume 19.6 |
