Principles of Attachment Selection for Implant Supported Overdentures
| Principles of Attachment Selection for Implant Supported Overdentures | Hamid Shafie, DDS* and George Obeid, DDS** |
|
**due to the size of some of the pdf files some might be hard to load, download the pdf instead. |
|
| and insert them into the housings. We recommend beginning with low retention males. (Figs. 7E, 7F) (Continued on P. 13)
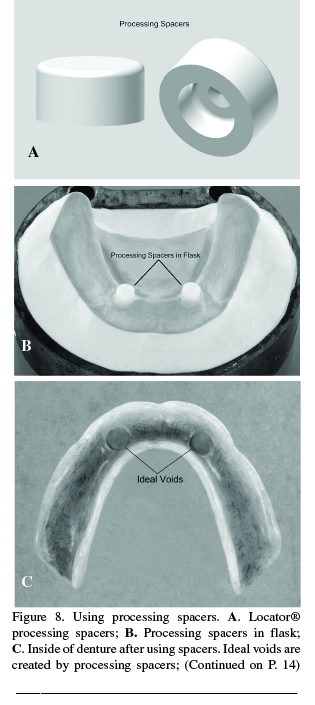
• Deliver the definitive overdenture to the patient. (Fig. 7G) Using the Chair-side Direct Technique with processing spacers The following steps are the Direct Technique used when auto-curing Locator® males at chair-side after using processing spacers in the lab. Processing spacers are available to create ideal space in acrylic for direct auto-polymerizing of male elements at chair side. (Fig. 8A) • Place the processing spacers onto the Locator® female analogs prior to acrylic processing. If necessary, block-out any gaps under spacers with plaster or putty. (Fig. 8B) • Process and finish the acrylic in the usual manner. Then remove the processing spacers with the removal tip of the Locator® core tool. (Fig. 8C) • At chair side, place a white spacer sleeve over a Locator® female abutment. Then place the metal housing with a black insert. If possible, pre-air abrade the metal housings. (Fig. 8D on P. 14) • If necessary, block-out any gaps beneath the white spacers. • Create a vent hole lingually to allow expression of excess acrylic. Place a thin mix of auto-cure resin over the metal housing. (Fig. 8E on P. 14) |

(We recommend doing one at a time.) • Place a thin mix of acrylic into the void in the denture. Seat the overdenture, and ask the patient to close |
|||
|
SROMS |
|
13 |
|
Volume 19.6 |
